This post contains affiliate links to products, services, or education. We may receive a commission for purchases made through links.
If you are just beginning to enter the world of welding, then you need to know how a welding helmet works. The welding helmet is a vital protective tool that protects you from the elements of welding.
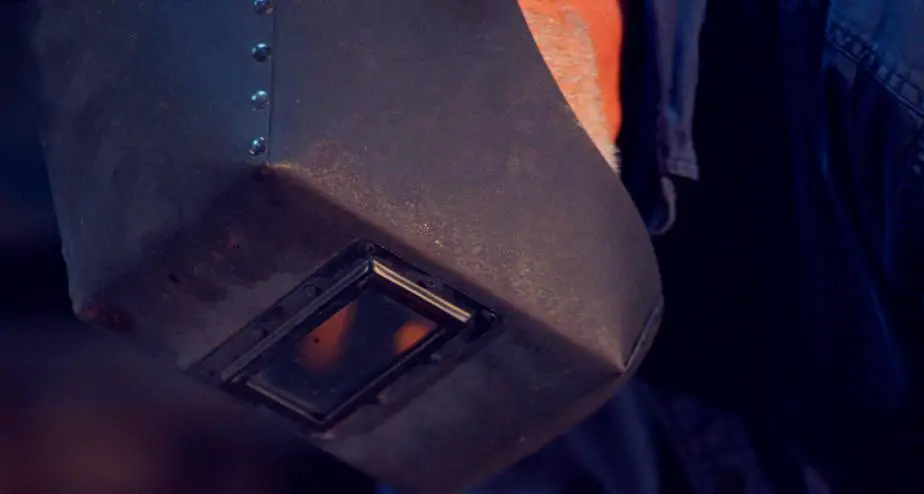
How do welding helmets work? Welding helmets are meant to stay on the entire time you are welding. The helmets work by using a particular shade number for different welding processes to protect your eyes from harmful lights. Some helmets will darken to a certain shade when it senses the arc is being lit.
If you are in the market for a new welding helmet, just know that there are six types of helmets. So, learning about the traditional welding helmet can help you determine which welding helmet is best for you.
Check out our recommended welding helmets here.
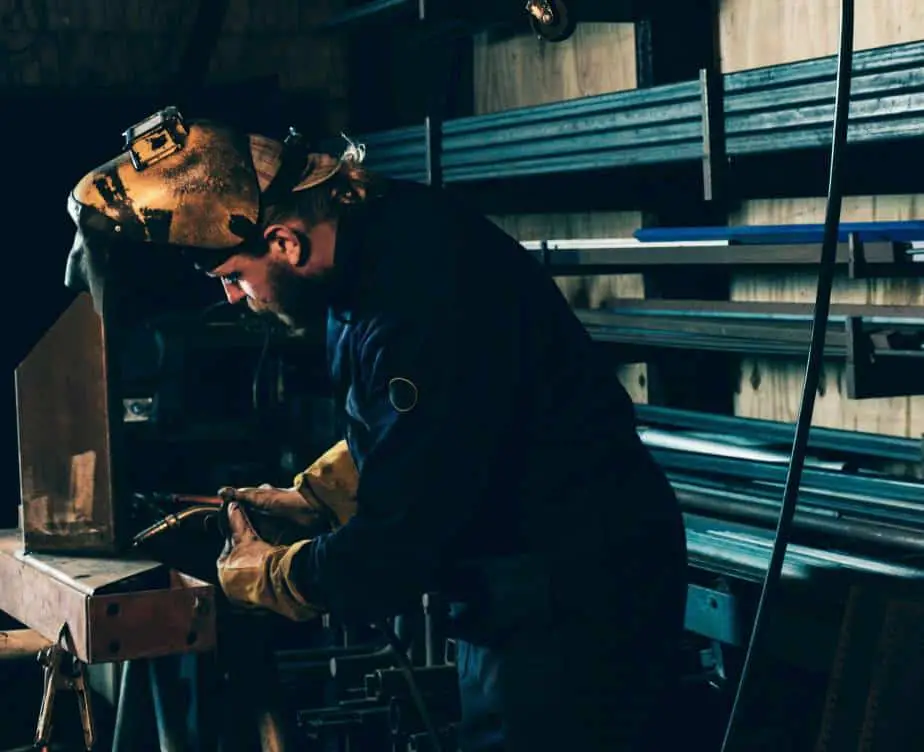
How Do Traditional Welding Helmets Work?
The standard or traditional welding helmets are also called passive welding helmets. There are five other welding helmets to choose from that include:
- Auto-Darkening Helmet
- Solar-Powered Lens Helmet
- Battery-Powered Helmet
- Fixed-Shade Lens Helmet
- Variable-Shade Lens Helmet
Even though the passive welding helmet is an entry-level helmet, it can still protect your face and eyes when you are welding. Most traditional helmets do not have light sensitivity or delay controls that need batteries, and this makes them lightweight.
Along with their weight, they are smaller than other welding helmets. The traditional helmets come in a more compact size because they were meant to be placed in compact spaces.
Along with the traditional welding helmet being an entry-level helmet, it is budget-friendly. For this helmet to work, you will need to wear the helmet in an up position when you are using a:
- Torch
- Gun
- Electrode
When these devices are in position, you are now ready to strike the arc. When the striking is almost done, you should then flip the helmet quickly in a position that will protect your neck as well.
Shortcomings of a Traditional Welding Helmet
While the traditional welding helmet is used by even experienced welders, there are some cons to these types of welding helmets that include:
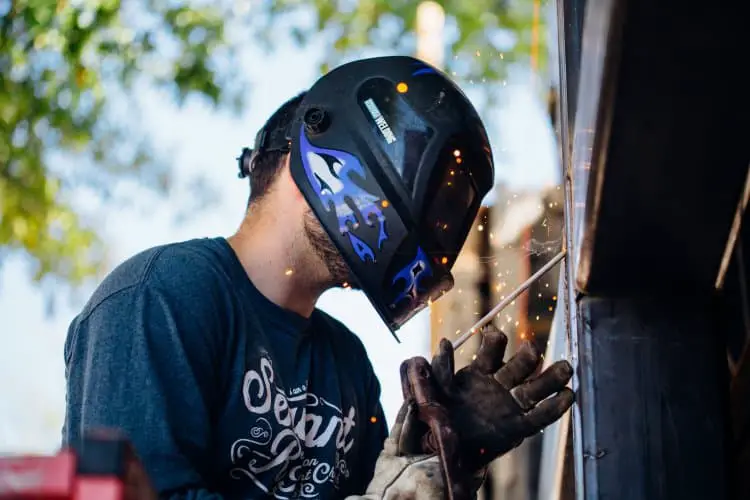
- If you are new to welding, putting the electrode into position while your helmet is snapped into place can be hard. Should you be unable to position the electrode correctly, this can make your weld insufficient and can cause excessive grinding.
- When you do short welds, it can start to become tedious as you will have to continuously raise and lower your helmet, even though the helmets are lightweight.
- When you continue to raise and lower your helmet, it can lead to neck fatigue and repetitive stress injuries.
Although traditional welding helmets are more common, they are often compared to auto-darkening welding helmets. There are some things you should learn about auto-darkening helmets that will help you determine which welding helmet is best for you.
How Do Auto-Darkening Welding Helmets Work?
Auto-darkening welding helmets help you weld faster because it gives you the chance to work without any distractions or pauses. There are four ways in which auto-darkening helmets can be the better choice for you, that include:
- Easy Shade Transitions
- Number of Sensors on the Lens
- Adjustable Delay Control
- Adjustable Sensitivity Control
- Solar and Battery Power
Here’s a short video to help you see what I’m talking about.
1. Easy Transitions
When your helmet is activated, the lens turns the shade to a number 3 or 4. So, when you are welding and your helmet is activated, you will not need to remove it from your head to view your work. You can see through the lens once your helmet deactivates.
These helmets use an auto-darkening filter lens that is a certain type of liquid crystal display (LCD). LCDs are most common in televisions and other pieces of electronics that have screens attached to them.
The auto-darkening filter on the lens will react on your helmet when you light the arc. These filters have sensors that can detect the arc and will bump up the shade of your lens from a 10 to a 13. This way you do not have to worry about your eyes since they are protected with Ultraviolet (UV) and Infra-Red (IR) filters.
2. Number of Sensors
The number of sensors that turn on an auto-darkening helmet depends on the grade of helmet you purchase. This means that if you purchase an entry-level helmet, the lens filter will only have two sensors. Should you purchase an industrial-grade helmet, you will have four sensors on your lens filter.
The more sensors your lens has, the better suited you are to handle a wide variety of welding jobs.
Beware, if one of your sensors begins to fail by not adjusting the appropriate shade, the helmet is now unusable. Continuing to use a helmet with a failing sensor can cause your eyes to be damaged by the brightness of the arc.
3. Adjustable Delay Control
There is a delay control that lets you enable how long your lens will stay dark once the welding arc comes to a stop. If you happen to be doing short welds on a project, a short delay can help you move on to another position for your next weld without having to worry about the shade.
If you are welding anything that may contain molten metal, it is best to use a longer delay, as the metal can still give off harmful rays until it cools down.
4. Adjustable Sensitivity Control
When you are looking for a mid to professional-level auto-darkening helmet, they should have the capability of adjusting how much light can start the process of the lens darkening.
These adjustable sensitivity controls do come in handy should you be welding at low amperages when the arc is not as bright as other welding processes.
5.Solar and Battery Power
Auto-darkening helmets use different sources of power. Those different power sources include the following:
- Lithium-powered batteries
- Solar power
- Rechargeable batteries
- Replaceable batteries
When you have a helmet that uses replaceable batteries, they can last longer than those that don’t use replaceable batteries. So, it is up to the welder to make sure that their helmet turns on and off only when they need it to be. The non-replaceable battery helmets have an estimated lifespan of 5 to 8 years.
Solar-powered helmets can last a bit longer than 5 to 8 years, however, before you start the welding process, charge them up in the sun the day before.
There is a combination of both solar power and battery helmets. This allows you to charge your helmet in the sun and if you use all of your solar energy up, the helmet then switches to the batteries. Although, should you work underground or in a large building, it is best to work with a helmet that uses batteries.
You now know about two of the most popular welding helmets to choose from, but you must also take into consideration how the helmet must fit.
How Should My Welding Helmet Fit?
When you pick the helmet, you believe will work best for you, the fit of the helmet needs to be addressed. You should feel comfortable in the helmet while not having it feel as if it is squeezing your skull. The helmet should not be too loose, as there should be room for your head and the padding on your brow and the back of your neck.
Weight of Your Welding Helmet
If you are someone who does long welds, a heavy helmet is going to cause you to experience more fatigue than if you chose a lightweight helmet. Over the course of time, some welders begin to feel the weight of their heavier helmets after several hours. The mix of heat and sweat can begin to make conditions unbearable after a long shift at work or even during a personal project.
A newer, lightweight helmet keeps your neck away from any stress and lets you feel safer and more comfortable. There are lightweight helmets that weigh in at approx. 18 to 21 ounces with a full-coverage shell around your head. The lightweight helmets can also come with a smaller view size and a more compact shell than can weight 15 to 31 ounces.
The headgear that sits inside of the shell needs to be able to distribute the weight of the helmet as equally as it can be. Should the helmet’s headgear be made with a single band, the entire weight of the helmet is going to be on that one band.
If there are several bands to help with the weight of the helmet, it can displace the weight and make it feel more comfortable. The more professional welding helmets have a pivot-style headgear that reaches around the base of your skull to secure the helmet in place.
Comfort Levels
To make sure that you feel comfortable in your helmet, try the helmet on and check to see if it can adjust:
- Up
- Down
- Forward
- Back
Most welding helmet headgear assemblies do not have a fore/aft adjustment to set the helmet’s distance from the face. Some people may see this as a concern for those with larger heads and facial features that are prone to sticking out.
With any welding helmet, you want to be sure that you can tighten it around your head when needed. Also, determine if the rate of fall and degree of the tilt will allow the helmet to lower in a more controlled and relaxed manner.
While there are helmets that do not have a damping feature, it can sometimes be startling for welders when the helmets dive into position. Other models have a resistance feature that allows the welder to control how fast the helmet falls. The endpoint can be controlled when the helmet stops when lowered into a welding position.
You want to be sure that the helmet locks into place when you move it into an upward position. Check to see if the helmet is balanced in the down and up positions, so the weight of the helmet is not pulling you forward. The more off-balance your helmet is, the more it will begin to put a strain on your neck.
When it comes to a comfortable helmet, it is recommended that the shell be made of plastic that is thin walled, but capable enough to endure sparks and molten metal coming from the arc.
Viewing Size
Check the viewing area of your lens on the welding helmet you wish to purchase. You need to be able to look at the project you are working on with minimal effort. You should not have to remove your helmet to view the entirety of your work.
The best option for your viewing area is going to be a full coverage option. Most entry-level to mid-level helmet will offer you a viewing size of 6 square inches. Industrial grade helmets will let you see about 9 square inches.
Another key known factor when choosing the right helmet has to deal with knowing the correct shade numbers to protect your eyes when you weld.
How Should the Shade On the Helmet Work?
You will see ANSI/ISEA Z87.1-(Insert Yearly Edition Number) to indicate the new standard in rules that is regularly updated when it comes to safety eye and face products. The most up-to-date standard is the ANSI/ISEA Z87.1-2020. This standard includes:
- Safety Goggles
- Welding Helmets
- Face shields
- Spectacles
The welding shade numbers are there to identify the darkness of the glass used in the helmets. The lower the number, the more light that comes in. The higher the number, the darker the shade is. When dealing with different welding processes, it will require that you use a specific shade number. The shades can reach from:
- Numbers 8 to 13 for welding
- Numbers 5 to 8 for cutting
- Number 13 for grinding
Traditional welding helmets already comes with a fixed-shade lens that is usually at a number 10. This does, however, depend on the manufacturer and model of the helmet. If your helmet does not have the right shade for the project you are completing, you will be unable to start your project.
When it comes to auto-darkening welding helmets, the number 3 and 4 filter, is the equivalent of using a pair of sunglasses during the day. The light sensors on the lens are going to adjust so that the lens gives you the right shade for the job.
A fixed-shade helmet is a sort of auto-darkening helmet that can only be changed to a number 10 shade. Should most of the projects and welding processes you use have the same material and thickness, this helmet is right up your alley.
Variable shade welding helmets are recommended when you are using different welding processes constantly. The shade range on these helmets can reach a number 9 to a number 13.
So, you have purchased your welding helmet and you need to test it out to make sure it is working. However, you are unsure about what signs to look to make sure your helmet is operational?
How Do I Know If My Welding Helmet Is Working?
Welding is serious business and it requires a lot of protection to keep you and others safe. If your helmet is not working properly, this can put your health in danger. Here are some steps to look for when checking on your helmet:
1. Eye Fatigue
Eye fatigue comes from there being too much light that enters through the lens. This is a sign that you need to either replace your lens or evaluate the shade range that you are using for your welds.
Eye fatigue can be brought about by the following:
- Actual pain in the eyes
- Blurry vision
- Double vision
- Headaches
2. Code Check
There are some welding helmets that may say that they meet ANSI standard, but more than likely they have not been tested yet. At this moment, any welding helmet that you own must meet the current standard of ANSI/ISEA Z87.1-2020.
3. Fit
If you have the correct fit for your helmet you will notice that you do not get fatigued as fast. The proper fit also helps with slowing down the spread of neck pains that can come from an imbalanced helmet.
Try looking for a lightweight quality helmet that stands up to the heat and sparks. This will make welding a more bearable process.
4. Lens Selection
To prevent eye fatigue, reintroduce yourself to the shade range on your lens. Take note of the welding processes you use and the shade on the lens you currently use.
For example, if you are using the MIG welding process that requires 60 to 500 amps, your lens must have a minimum shade of 10. If you have been using your helmet for a long time and your eyes continuously hurt, change the lens.
5. Sun Test
The sun test can be used for traditional and auto-darkening helmets however it may work better with auto-darkening. All you have to do is:
- Go outside during the day, where the sun is visible, and you are comfortable.
- Put your helmet on and glance towards the sun to see what your lens will do next.
- If your helmet is up to code, then your lens will darken.
- Next, look at the sun one more time and move your hands slowly in front of your face. With your hands moving slowly, your auto-darkening helmet should identify the light.
This means that your lens should darken and stay that way. Should it have the opposite effect, think about replacing or fixing your current helmet.
6. Check Visibility
Purchase the helmet that has the right amount of visibility for you. You do not want to have to strain your neck and eyes too much to see your work.
With an auto-darkening helmet, you should be able to see your work even with the highest shade number. If you continue to use this helmet and cannot see on the highest shade you will begin to strain your eyes. Purchase another auto-darkening helmet if you must.
You may need to fix your auto-darkening welding helmet at times, especially if it is solar-powered (several other tips just like this are covered if you check out our 9 common welding mistakes article) (several other tips just like this are covered if you check out our 9 common welding mistakes article) . Check out our article on how to fix your too dark welding helmet here.
If your welding helmet flashes, check our how to fix it here.