
This post contains affiliate links to products, services, or education. We may receive a commission for purchases made through links.
So, you’re interested in welding, but have you wondered how arc welders work? Manufacturers, welders, artists, and hobbyists use arc welding more than any other welding technique, and if you want to learn a challenging and rewarding craft, arc welding may be for you.
How do arc welders work? Arc welders use DC or AC to form an arc between a flux-coated electrode and a base metal that fuses the metals and forms a weld pool. When a welder moves the weld pool between the base metals, it forms a strong bond that joins the metals.

Welding is a skill that’s in high demand, and it encompasses a wide range of fields and industries. Although there are several types of welding, stick welding is appreciated for its versatility at the job site and the workshop. Stick welding is also known as arc welding, Shielded Metal Arc Welding (SMAW), or manual metal arc welding (MMAW).
Unlike other forms of welding, arc welding does not require the use of an external gas tank. The flux covering of the electrode creates protective gas when the arc heats it. If you’re interested in arc welding as a career or as a hobby, it’s crucial to examine the preparation involved, essential equipment, proper techniques, and possible risks.
How Do You Arc Weld?
Before we get into detail, here’s a great intro video to get a great overview on beginning arc welding.
Before you start your first arc welding project, you’ll have to set up your workspace, so you work efficiently and safely. The following list displays the steps for preparing your area for welding.
- Find a ventilated area to work
- Clean the base metals
- Attach your work clamp near your welding zone
- Check the electrode for the correct machine setting
- Set the amperage
- Wear protective gear
Ventilated Work Area
Depending on the types of metal you work with, the fumes from the flux burning off can be toxic. For instance, if you weld galvanized steel, any part of the zinc coating that is not removed before welding will emit zinc and lead fumes.
If inhaled, the fumes from the coating can lead to galvanize poisoning. Welding outside is the ideal location for an arc welder, but if that is not possible, try working in a room with open windows.
Sometimes, you may have no other choice but to weld in a cramped, non-ventilated space. If that’s the case, try using a fume extractor. Set up the extractor close to your work area to ensure the fumes blow into the extractor.
Fans are helpful, but if you’re working in a closed room without ventilation, the fans will only blow the fumes around.
Clean Your Base Metals
Compared to MIG and TIG, arc welding is not as affected by rust or coated metals. However, your arc is more uniform when welding clean metals. A uniform, consistent arc will produce the finest weld. Some coatings and chemicals will cause the arc to jump around and can lead to a mishappen, weak bead.
Wipe the base metals with a dry rag and remove any flammable liquids from the work area. Avoid using any type of cleaning product to clean the metal. Dried residue from cleaning sprays can ignite when you weld over it, and in the worst case, the metal can explode.
Clamp Your Base Metal
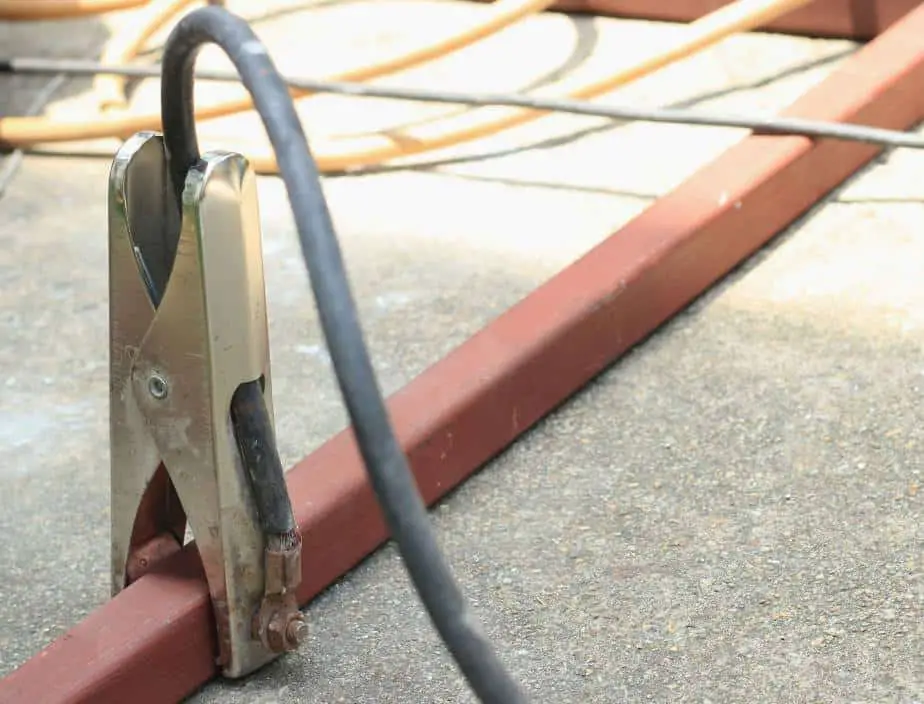
Attach the work clamp to the base metal you’re using, but avoid placing it directly in front of the section you’re welding. If you’re working with DC and the clamp is too close to the arc, the arc will move around erratically. The arc reacts to the magnetic field of the clamp if it is too close to the weld.
If you forget to fasten the clamp onto the workpiece, the arc will not spark. The clamp sends a current, which is the opposite of the electrode’s current, into the base metal. An electrode with a positive polarity will not ignite if there is not a negative current running through the base metal.
Electrode Specifications
The instructions included with the electrodes will state whether AC or DC is suitable for the electrode. Most newer models of arc welders allow AC or DC, but the famous Lincoln Electric arc welder only uses AC (check it out here on Amazon).

A DC positive electrode setting will penetrate deeper than the AC setting, and if you want to weld thin metals, DC negative electrode is the ideal setting.
If the arc jumps around and produces an inconsistent weld, you may have the machine on the wrong setting. A quick online search will reveal which electrodes use AC or DC if you lose the instructions from the electrode packaging.
Amperage Settings
Like the polarity setting, you can find the correct amperage setting in the electrode instructions. The amperage from the instructions is the recommended setting, but you may have to adjust the amperage after you start welding.
If you have not used a specific electrode before, it’s a good idea to perform a few test welds on a piece of scrap metal before you focus on your main project. Setting the amperage at the ideal level is crucial to producing even, uniform welds.
When you test the electrode, examine how the arc travels across the metal. If the electrode does not fuse to the base metal or lacks depth and penetration, the amperage is too low.
The amperage is set too high if the arc burns through the metal or reacts violently. The electrode will disintegrate faster at higher amperages. If the entire electrode begins to glow brightly, the amperage is too high. It’s normal to adjust the amperage above or below the recommended setting.
A practical way to adjust the machine is by increasing or decreasing the amperage in small increments. Try using only 5-amp changes when you’re adjusting to find the sweet spot for your arc. Once you’ve finished the preparations, it’s time suit up with protective gear.
Protective Gear
Check out our recommended welding gear here (you don’t want to skimp on this).
Of all the steps in the preparation process, wearing the correct protective gear is the most important. Never start a welding project without using a welder’s helmet, apron, gloves, and respirator. Every welder on the planet uses the helmet, apron, and gloves, but some choose not to use a respirator.
A respirator can be challenging to fit under a helmet, and some welders complain about the added weight of the respirator. However, modern, premium respirators are the best protection against the harmful fumes of consumable metals.
Even if your friends or coworkers antagonize you for wearing a respirator, ignore them and wear it whenever you weld. A respirator will also protect your lungs when you grind dirty base metals before you begin welding.
We have respirators that we highly recommend posted here, so go check them out!
Using an Arc Welder
Strike the Arc
Initiating your first arc strike is not as easy as it looks. It’s not an entirely daunting process, and once you practiced it a few times, you’ll get the hang of it. Understanding how the arc welder produces an arc can help you achieve a perfect strike.
For example, if you’re using a DC negative electrode, your base metal clamp should be positively charged. When you touch the electrode to the base metal, you’re creating a closed circuit. By lifting the electrode off of the metal, you’re opening the circuit and creating an arc.
Treat the electrode like a match head and scrape it against the base metal. The welder will spark and produce an electric arc when the electrode pulls away from the metal.
The key to this technique is to keep the electrode hovering slightly above the base metal after you strike it. If you pull the electrode up too high, the arc will falter and disappear. The base metal and electrode must be close to each other but not touching to maintain a consistent arc.
After striking the metal, if you put the electrode too close to the base metal, it can stick. You don’t want the electrode to fuse into the metal before you make a weld. If the electrode sticks to the metal, turn off the machine and carefully twist the electrode to remove it.
Don’t get frustrated if you have to practice a while to maintain an arc. It’s an intuitive process that you’ll only perfect with practice. Some welders suggest using the tap method when you’re learning how to weld.
The method involves tapping down on the base metal with the electrode. With minimal force, tap the stick onto the metal and pull up slightly. Just remember not to pull up too high on the upstroke or the arc will go out.
Whichever technique is more effortless for you is the one to use. As long as you’re able to hold the electrode close to the base metal after the strike, your arc will be consistent.
Weld the Workpiece
Unlike MIG and TIG welding, stick welding machines do not automatically feed the electrode. It takes more skill and patience to produce professional welds with an arc welder since you have to compensate for the shrinking electrode.
As you move the arc along the base metal, the electrode is consumed by the intense heat. The longer you weld, the shorter the electrode will become. The distance from the electrode to the base metals should be equal to the electrode’s diameter. You will keep the electrode 1/16” from the base metal joint if the diameter of the stick is 1/16”.
As the electron shortens, you have to adjust the grip you have on the electrode holder. You’ll have to position the electrode closer to the weld pool as it becomes smaller. If you cannot correctly position the electrode, you may experience long arcing or short arcing.
Long Arcing
Long arcing occurs when you have the electrode too far above the base metal. The long arc will produce wide and sloppy-looking welds. The arc is harder to control when it’s too long and will produce substantial spatter.
With a little practice, you’ll be able to recognize a long arc by the sound it makes. Long arcs make a sharp, cracking sound. Eventually, the arc will go out entirely if it’s too long.
Short Arcing
When you hold the electrode too close to the base metal, short arcing can occur. Short arcing produces narrow, uneven beads and can be identified by a unique buzzing sound. Short arcs usually result in the electrode sticking to the base metal.
Maintaining Electrode Angle
After you’ve practiced maintaining a consistent arc, focus on the angle of the electrode. The angle you use will change depending on the type of weld you perform.
For instance, if you weld two base metals on a flat surface, you’ll want to angle the electrode only 10° to 15° towards the direction of the weld pool.
Maintaining Your Speed
Another critical aspect of producing quality welds is the travel speed of the arc. It’s tempting to quicken the process, do not move the arc too fast.
A slow, consistent movement achieves superior welds. Rather than forcing it quickly, you have to move the weld pool along the area steadily.
Cleaning the Weld
Each electrode produces different degrees of slag. Slag is the protective layer over the weld created by the flux. One disadvantage of stick welding is that it produces a substantial amount of slag.
Unlike MIG welding, stick welding requires a more extended clean-up period. When the electrode flux burns, it creates the shielding gas that protects the weld from the atmosphere.
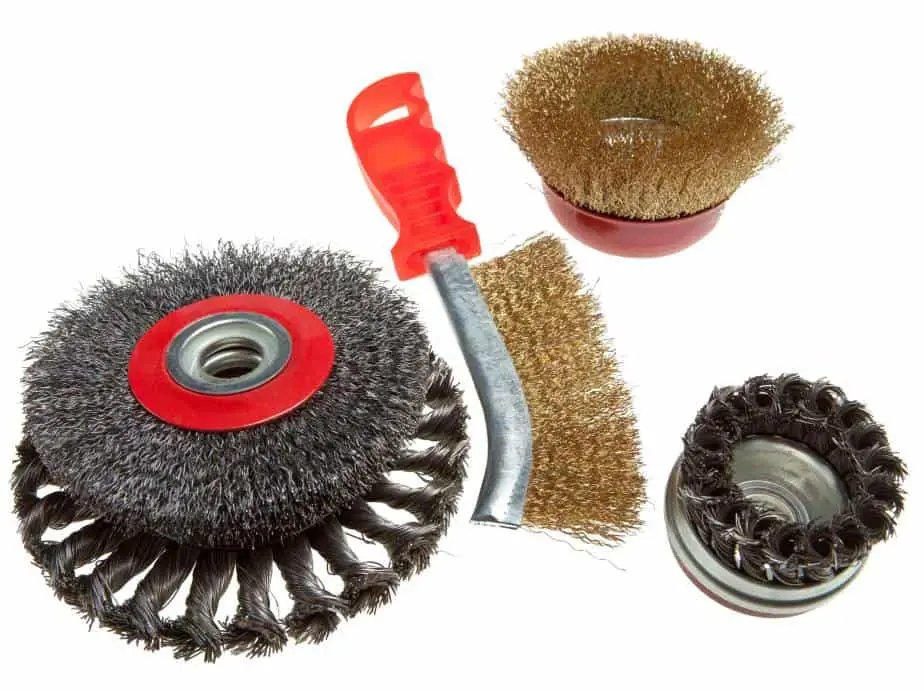
When the weld cools, the protective layer hardens into a dark coating that covers the entire bead. You have to chip off the slag and scrape it with a wire brush to reveal the finished bead.
If you have to weld over a previous bead, the bead must be free of slag. Old slag can contaminate your weld pool and should be removed entirely.
What is the Arc Time When Welding?
The arc time is the length of time you maintain a steady arc. For small projects, you’re likely to have short arc times that amount to less than a minute of welding.
When you tackle large projects with long pieces that need joining, you’ll have longer arc times. Longer arc times require more skill and patience. Amateur welders tend to rush projects that require long arc times. Regardless of the length of the weld, slow and steady is the way to move the weld pool.
What is Weaving When Welding?
Weaving is a method that achieves a wider bead. If the joint between base metals is too wide to seal with a single, straight-line pass of the weld pool, you can move the electrode from side to side as you guide the weld pool.
For electrodes that are ¼” or thicker, weaving may be unnecessary, and you should be able to weld the pieces without weaving.
Is Arc Welding Dangerous?
For multiple reasons, arc welding can be a dangerous activity. The glare from the arc at high amperage is brighter than the sun. For the amateur hobbyists, the danger is minimal if safety guidelines are observed.
For professional welders, the dangers of arc welding are increased when welders have to work in harsh conditions and challenging environments.
Electrical Dangers
Whenever you work with an electric current that produces high temperatures, taking safety precautions is essential. You’ll risk electrocution if you fail to wear protective gear such as welder’s gloves.
If you set up your machine correctly and keep your clamp attached to the workpiece, you’re unlikely to be electrocuted.
Combustible Dangers
Keeping flammable materials away from your work area is vital if you want to avoid a fire or explosion. Remember, the arc welder is designed to melt and fuse hard metals. It can even cause concrete to crack or combust if you happen to weld pieces directly on your garage floor.
Welding tanks that contain compressed gas or air is a sure-fire way to earn a visit to the hospital or cemetery (no matter what the welding tank size) (no matter what the welding tank size) . Although that may seem like an unrealistic scenario for an experienced welder, unfortunately, it occurs more frequently than you can imagine.
Some thoughtless supervisor, who does not have your best interests in mind, could demand that you weld a damaged propane tank.
Most experts warn welders not to weld empty gas tanks. Residual compounds can ignite under the heat of an arc welder, and even an empty tank poses a danger to a welder.
Environmental Dangers
High winds, thunderstorms, and high-altitude work sites also pose a risk to professional welders. Welders frequently work in high-risk areas such as skyscrapers, bridges, underground tunnels, and underwater projects. Harsh weather conditions intensify the danger level of an already risky profession.
If you experience winds of over 35 mph or pouring rain from a thunderstorm, cease your work immediately. A welder must follow safety procedures at all times regardless of the weather or environment.
How Can a Beginner Start Arc Welding?
You may be interested in arc welding but are unsure how to pursue adequate training. With a low supply of experienced welders and a high demand for welding work, the United States does not lack in available training options.
Technical or Community Colleges
The best way to learn arc welding is to enroll in a welding training program. Experienced welding instructors educate you on welding’s fundamentals, safety procedures, terminology, and career planning.
Most programs include a certification test that allows you to become a certified welder. A certification will impress potential employers and can lead to a promising career in welding.
Apprenticeships
Because their current demand for welders is so high, some employers offer on-the-job training. Try reaching out to companies you’re interested in and inquire if they offer apprenticeships.
We talk about welding apprenticeship pay here. It’s a good read to get to know the benefits of welding apprenticeships.
You have several options where you can apply. Machine shops, body shops, construction outfits, industrial manufactures, and utility companies are only a few of the many organizations that require arc welders.
Online videos and online instruction courses are helpful, but you shouldn’t rely on them as your main source of training.
Videos can show you helpful tips from professionals, and some might even persuade you to start a career in welding. However, only hands-on training can provide you with adequate instruction.
As previously discussed, arc welding is not a simple process. Professional courses and several hours of practice will give the essential training you need to become a competent arc welder.
Closing Remarks
Arc welding is an exciting and challenging form of welding. Although it requires a high level of expertise compared to other types of welding, arc welding remains the predominant form of welding around the world.
So, if you’re ready to become an arc welder, study hard, practice your techniques, and strike that arc!
