
This post contains affiliate links to products, services, or education. We may receive a commission for purchases made through links.
So, you want to weld brass to brass. Working with brass is a simple process to learn, and it is also very rewarding because brass looks fantastic when combined with wood or other metals. Brass can be used to create parts or even entire automation if you are building an engine. Once you start learning how to work with and weld brass, you’ll be making many beautiful pieces!
How do you weld brass to brass? It is very possible to TIG braze as well as solder brass to brass. To do it effectively, you should know how first to cut, manipulate, and solder brass so that you can weld it. Brass is very easy to work with, and since it can be soldered and brazed, welding brass pieces together (effectively and aesthetically) is quite simple once you understand the basics steps of working with brass.
Since there isn’t a lot of information available on the Internet today that covers welding brass to brass, we created this guide to help you learn. Below we’ll cover how to cut brass before you weld it, how to work with brass so you can prepare it for welding, and how to weld and solder brass.

If you are already knowledgeable in the beginning steps and have experience TIG welding, here is a video on the process.
If you need a lesson on the basics, please check out our in-depth article on what TIG welding is and how to begin learning it here. For more info on brass specifically, keep reading!
Preparing for Welding: Cutting Brass Pieces
Understanding how to cut brass pieces is the first step in the process of learning how to weld two pieces of brass together. You’ll need to know how to manipulate the brass items you plan to work with, and the first part of that is understanding how you can cut your brass pieces.
Luckily, when you are cutting your brass pieces to prepare for your next welding project, you’ll have several options. However, there are different types of brass items out there. So, if you want to know how to cut properly, you’ll need to know what your options are for cutting different kinds of brass.
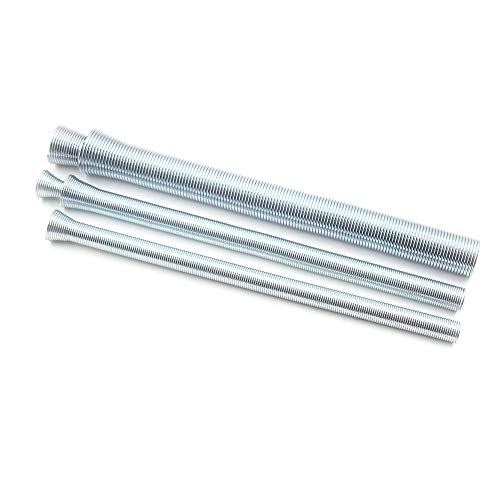
The different kinds of brass pieces you’ll most likely be working with include brass rods, which you can cut with cutting pliers or a hacksaw, brass tubing, which you can cut with a saw or a tubing cutter, and brass sheets, which you can cut with a hacksaw or shears. But first, we’ll start with the different methods you can use to cut the brass rod.
Can I just use a Dremel or Torch Cut the Brass?
In short, you sure can!
You’ll need a steady hand with sheet metal, but I actually prefer a Dremel with rods and tubing. If you’re TIG welding it already, keeping a steady hand with a brass sheet should be no problem at all.
I love my Dremel 4300 (check it out on Amazon Below). It is a fast, precise way to cut your brass as you need on demand.

Cutting Your Brass Rod Before Welding

When it comes to cutting brass rod, you have two options in tools you can use to make your cuts. You’ll either need to use some cutting pliers or you’ll need to grab a hacksaw. We’ll describe how you can cut brass with both tools below.
Cutting Pliers and Brass Rod
If you’ve got some very tiny pieces of wire or rod, then all you’ll need to use for cutting brass is some wire cutters. However, if you’ve got a larger gauge, then you might need a more massive pair of cutting pliers, or even bolt cutters if the piece is quite large. You can use any of these tools as long as you put the rod up into the jaws before you cut.
If you use wire cutters to cut your brass, sometimes, depending on the type of wire cutters you use, you might wind up with some sharp ends once you’ve finished cutting. If that happens, don’t forget to file, sand, and grind the end of the newly cut piece until it’s flattened.
A Hacksaw and Brass Rod
If you own a hacksaw and you want to cut a larger piece, then you should still be able to cut your brass rod. First, put the rod that you plan on cutting into a vise and make sure it holds the piece securely. Next, cut as close to the vise as you possibly can to cut back on the vibration.
Also, always remember that a hacksaw is a two-handed tool. So, when you use your hacksaw, put one hand on the handle and the other hand on the frame of the saw. You cut with the saw as you move the tool away from you. So, begin cutting with tiny strokes starting with the blade that is closest to the handle. Once you’ve formed a groove for the blade, keep using your arms and body weight as you cut each stroke.
As you cut your brass rod to prepare it for welding, you won’t need to use a lot of downward pressure with your hacksaw. Focus on making long, steady movements and utilizing the entire length of the blade instead of cutting frantically. Stay focused and keep it slow as you cut through the metal. That way, you won’t cut through something you didn’t intend to cut.
Cutting Your Brass Tubing Before Welding

Now that we’ve given you some guidance about cutting brass rod, we’ll move onto brass tubing. If you plan on working with brass tubing when you weld, you’ll need to know how to cut it first before you start welding pieces together. You can cut brass tubing by either sawing it or using a tubing cutter. We’ll discuss both methods in more detail below.
A Saw and Brass Tubing
One way you can cut brass tubing is by using either a small or a large metal saw. We recommend cutting your brass tubing inside a miter box. Put your tubing inside one of the grooves on the miter box and then start cutting. The saw will go through the tubing and cut both of the walls at one time.
When that happens, your saw can bind up, meaning you’ll now find it tough to saw through the tubing. Instead, try to avoid the bind of the saw by rotating your tubing away from you as you cut. That way, you are sawing through only one part of the tubing at a time.
A Tubing Cutter and Brass Tubing
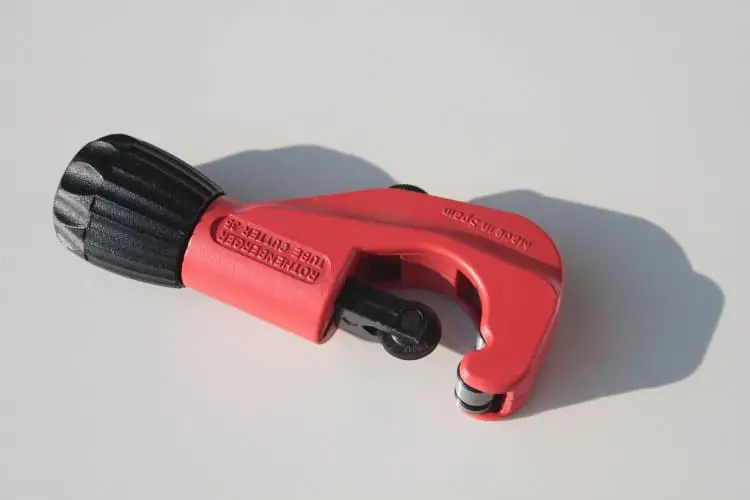
You can purchase a tubing cutter at any local hardware store, and that cutter will help you cut any metal tubing you have, including brass. If you have a tubing cutter, you’ll need to clamp your tool into the tubing. So, first, place the tool where you need to cut. Next, you’ll move the tool around the tubing a few times.
After that, you’ll need to turn the knob a bit so that the blade goes back on the tubing, and circle again. You’ll need to repeat this process until your tubing divides. Make sure you don’t start tightening the knob too much, or the tubing might come out looking crimped when you cut it.
If the tubing comes out looking like one of the ends got crimped, then you can use a tapered reamer to fix this problem. You’ll need to file the crimped end or sand it off to finish it. Also, make sure you cut your piece long before you start the process just in case you need to sand some away due to a crimped end.
Here is a tubing cutter that comes recommended:

Cutting Your Brass Sheets Before Welding
The last type of brass you’ll need to learn how to cut before welding is brass sheets. Brass sheets can be cut with shears or a hacksaw. We’ll cover each one of these methods below.
Shears and Brass Sheet
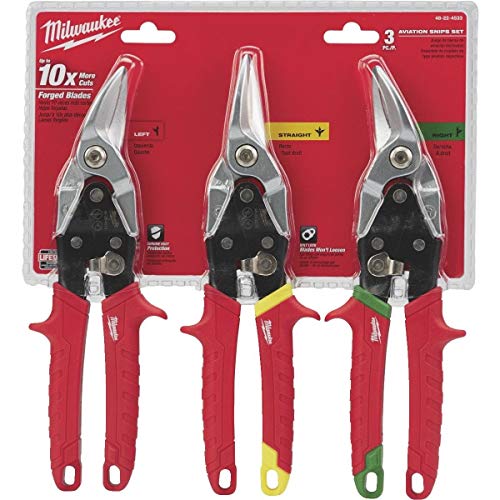
Shears are a great tool for cutting the brass sheet. We recommend using aviation snips if you have them, which typically come in three types: right-cut, left-cut, and straight-cut. You can use the straight-cut type to cut curves, as long as you are doing it from the outside. When you are cutting a circle, make sure you trim corners from the piece until it looks like a circle. After that, use the inside of the jaws for the last, curved cut.

A Hacksaw and Brass Sheet
You can also use a hacksaw to cut the brass sheet. If you’re going to use a hacksaw, you’ll need to put the brass between two plywood scrap pieces and clamp all of the parts with a vise. The wood should help keep the metal in place while you cut it. If you want to mark a line on your brass, then use a piece of plywood on one side of the brass. Remember, you should only ever push down when you use a hacksaw.
Now that you understand how to cut the different types of brass in preparation for welding brass to brass, we’ll cover how you can bend brass and shape it before you start welding your brass pieces together.
Preparation for Welding: Bending Your Brass
After you’ve cut your brass, you’ll most likely need to bend it some way before you can weld your brass pieces together. So, we’ll cover some approaches to bending the brass rod, tubing, and sheets. After you’ve bent and manipulated your brass, you’ll be ready to move onto the final step, which is welding brass to brass, which we’ll cover in more detail just a little later.
Bending Your Brass Wire Before Welding
You can bend brass wire with pliers easily. Place the wire in the pliers and hold them in one hand, and then manipulate the other part of the wire with your other hand. If you want to curve the wire of your bra and make shapes, you can crimp, bend, and then release the rod at certain points as you bend it. The closer the intervals, the sharper your curve.
If you want to create a sharp curve, then it’s a good idea to use round-nosed pliers for this job instead. You’ll need to start by bending the rod into the jaws. You can also use a pair of pliers in each hand if you want an extremely sharp bend.
There are a few options in metal-forming pliers that can help you bend all kinds of shapes into a wire, and you can make most of these same bends by just using one pair of flat needle-nosed pliers along with some round-nosed pliers. However, if you feel your pliers are making your bends look worse and leaving marks, then consider purchasing pliers that have nylon pads.
Bending Your Brass Rod Before Welding
If you have a very heavy brass rod, then you should consider using a bending jig to save yourself some time. You can mount your jig to a bench, and then clamp it down. When you use your jig, you’ll want to put the rod into the slots or the pegs. Then, you’ll use your hands to bend the rod and manipulate it into that area of the jig. So, you’ll be able to use both of your hands, and not need to worry about tool marks appearing on your wire.

Bending Your Brass Tubing Before Welding

Brass tubing is one of the most difficult things to learn how to bend when you are getting ready to weld. That’s because brass tubing can kink up and crush easily. We recommend using a spring bender for this type of material. Grab a spring bender that will fit over the tube you plan on bending. Move it onto the tubing and center it on the spot where you intend to make the bend.
Now, using both hands, bend your tubing and press your thumbs hard into the bend. If you can also use another spring with the tubing, you’ll have even more success when you try to bend the brass.
Bending Your Brass Sheets Before Welding
A bending metal sheet is also not an easy task. However, certain tools can help make the entire process more straightforward. Place your brass sheet in between two pieces of plywood, and then hold them down with a vise. Now, grab another piece of wood, and use it to put pressure on the brass so you can create a bend. With the block of wood, you should be able to put pressure on the whole edge that you want to bend without messing up the metal.
Now that we’ve discussed the various methods for cutting brass and for bending brass before welding, we’ll move onto discussing how to weld and solder brass to brass.
Welding Brass to Brass
Now that you understand everything about how you’ll prepare your brass pieces by cutting and bending them before you weld them, you’re ready to learn how to weld those brass pieces together. Welding brass is very easy because you can use soldering materials to complete your weld.
Below are some of the items you’ll need gather up before you learn how to weld brass to brass:
- Hammer
- Fire bricks
- Tweezers
- Metal file
- Brass pieces
- TIX brand solder
- TIX brand flux
- Abrasive pad
- Third-hand tool
- Butane soldering/welding torch
- Alcohol swabs
Now that you know the materials you’ll need to use when you start welding brass to brass, we’ll cover the types of solder and flux we’ll be using to finish this welding project.
Solder for Welding
For these welding steps, we’re going to use a softer solder from the Tix manufacturer. This solder is used by a lot of people that repair clocks and do a lot of brass welding. We decided to go with Tix because it’s a softer solder that also offers a lower melting point. When you are welding brass, you’ll want a softer solder with a lower melting point because higher temperatures make brass look discolored and uneven, and we want to avoid that.
Tips for Using Solder Successfully When You Weld
Before we break down the steps for welding brass to brass using solder, we’ll cover some tips for using solder successfully when you weld.
Tip #1: Make sure all the pieces fit together.
When you use solder as you weld, solder operates as a type of glue. It’s able to hold two pieces of brass together very well. When you join the pieces together, you’ll want to make sure your two pieces share a lot of surface space. ( Your math skills found here will help you with this).
If you can share more surface space, you’ll wind up with a stronger solder. Your solder won’t be strong if you have large gaps between your parts, or if your pieces don’t fit well together.
Tip #2: Make sure you’ve thoroughly cleaned the parts.
You can never overlook the importance of cleaning your brass pieces. If you don’t clean them, they won’t weld together well. If you want a strong solder bond, you’ll need to make sure all of your brass pieces are clean.
Tip #3: Make sure you’ve got all the pieces held tightly while you use solder to weld.
You’ll need to make sure your pieces aren’t moving around or off-balance at all. You want to make sure that you have all of your brass pieces held together firmly before you start using your solder to weld.
Tip #4: Heat the Parts to Weld, not the Solder
When many people use solder to weld, they forget that you don’t need to melt the solder. Instead, you should be heating the two parts you want to weld together until they are in the solder’s melting point. After that, you’ll be able to move the solder toward the hot part and then into the seams to weld the pieces together.
Tip #5: Preparation is Important when Using Solder to Weld
One of the biggest reasons why people have problems welding brass to brass when they solder is because they didn’t take the time to prepare everything (like cutting, bending, etc.) in the steps we described above.
Remember, whenever you are welding to solder, you’ll be spending most of your time getting ready to solder, not necessarily welding. So, pay close attention to preparation.
Welding and Soldering Brass to Brass Step-By-Step
Now that you understand how to prepare your brass pieces by bending and cutting them, we’ll walk you through the process of welding brass to brass by using solder.
Step #1: Get Your Work Area Ready
First, you’ll need to prepare your work area. You’ll want to make sure you’ve taken safety into account, too.
Take anything flammable and remove it from your workspace. Make sure you are in a well-ventilated area or gather up some fans so that you can blow out the fumes.
Step #2: Clean Your Brass Pieces
Now you’ll need to grab some sandpaper, a file, an emery cloth, Scotch-Brite pads, or whatever else you’ll want to use so you can clean the brass areas that you are welding. It’s a good idea to keep a fiberglass scratch brush around so you can scrub around difficult areas.
Remember, some pieces of brass will have a coat of clear lacquer on them to help keep them bright. However, when you are combining brass pieces, you have to remove the lacquer, or you won’t be able to use the solder to combine them effectively.
After you scour the pieces of brass, finish them off by wiping them with alcohol. Alcohol should help get rid of particles, debris, and oil left on the brass. When you’ve completed this, take the alcohol far away from your workspace (remember, alcohol is flammable), and let the brass pieces dry before you begin.
Step #3: Get Your Parts into Place
You’ll need to grab your clamps, so you’re prepared to hold your brass pieces together. You can also use Tall T-pins to hold pieces together, or heavier metallic objects.
Whatever you decide, make sure you’ve got your pieces in the right position. Also, remember that your parts will get very hot, so you don’t want to put anything close to the joint area you are welding.
If you do, it might wind up absorbing the heat and messing up your solder weld.
Step #4: Use the Flux
Earlier, we mentioned that you should use TIX solder for this process. TIX solder has a flux that goes with it, which looks like a clear liquid.
Your TIX flux will come with a bottle and a brush. While you might think the brush looks handy, it’s not. The brush moves the flux around to the wrong spots, so we don’t recommend using it.
That’s because solder will want to go anywhere you’ve placed your flux.
If you are trying to do this tightly, you can grab a very thin wire and dab small amounts of flux right where you want it to go.
All you need is a few droplets, and you’ll wind up with a capillary action that will help pull the liquid in between your two brass parts.
Also, if you want a little additional help for this step, TIX makes an anti-flux, which you can apply anywhere you want your solder to avoid.
Step #5: Prep Your Solder for Welding
Now you’ll need to get your solder ready for welding. How much solder you want to use and where you place it is a simple process, and you won’t have to touch anything while you do it.
Since round solder wire is very thick and can roll off your brass pieces, we recommend hammering to pound the solder wire totally flat. You’ll save a lot of solder by using this method.
Once you’ve flattened your strips, you need to cut off a tiny part from the flat area, then use your tweezers to put the solder onto the seam you are welding. After that, drop your flux on the solder.
However, always make sure you take steps to avoid getting flux on your tools since flux causes rust.
Step #6: Grab Your Torch
Now you’ll need to get your properly cleaned welding torch and get the solder to flow toward the head you are making with your torch.
As you heat the parts, the solder will keep flowing toward it, so make sure you get the solder everywhere to weld the pieces together.
First, you’ll need to turn your torch on and then bring the flame to a low setting. Using that low heat setting, heat your brass pieces. It can be difficult to get both of your brass pieces to reach the same temperature at the same time, especially if one is larger than the other.
So, you’ll need to plan to torch each piece proportionally to the size of each piece. The larger the piece of brass, the more heat you’ll need to apply to that piece.
Once you get the brass pieces at the right temperature, you’ll see the solder all flow in about a second and spread into the seam and other areas that have flux on them.
The solder will fall into the joint and look shiny. When you see that, take the flame away. You don’t need any more heat.
Step #7: Cool Your Pieces, and Clean Them
Now you’ll need to let the solder cool for a few minutes. Once you know it is cooled off, you’ll need to rinse the brass pieces in your sink to get rid of any excess flux. Now, dry your piece and clean it, so you don’t have any extra solder.
Once that is done, you should have successfully welded brass to brass.
Final Thoughts
Remember, when welding brass to brass, much of the time you’ll spend will be preparing your brass pieces, and not welding them together. Brass does require a lot of preparation to cut and bend, but once you’ve done that, the welding process is fairly straightforward.
